Block Editor Options
Short url: https://ewp.guide/go/be/block-editor-options
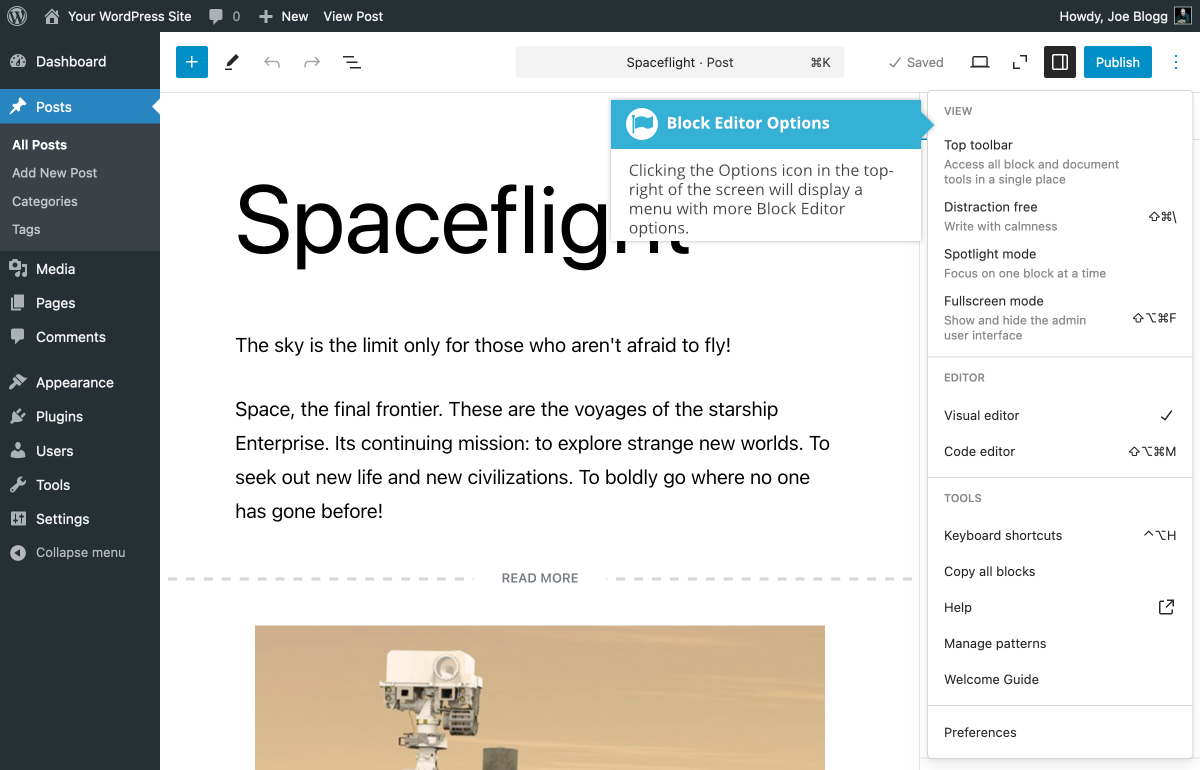
There are several options available to help customise how the Block Editor displays. These options can be found under the Options icon in the top-right corner of the page (![]() ) when editing a Page or Post.
) when editing a Page or Post.
The Options menu provides the following options:
- Top Toolbar – Enabling this option will display the Block Toolbar at the top of the page, rather than just above each individual block.
- Distraction Free – Enabling this option will hide the top admin bar, the Settings Sidebar, and also the individual Block Toolbars. This mode will provide you with a cleaner interface, suitable for long-form writing, but also stops you from being able to modify any settings for your content, or move content around, as all the toolbars and Settings Sidebar are hidden. To exit from this mode, you need to move your cursor towards the top of the page.
- Spotlight Mode – Enabling this option will dim all the blocks on the page except for the currently selected block, making it easier to focus on just that block.
- Fullscreen Mode – Enabling this option will hide the top admin bar and the left-hand menu. This is similar to the Distraction-free writing mode that was available in the old Classic Editor.
- Visual Editor – This option is enabled by default and will show your content as individual blocks.
- Code Editor – Enabling this option will turn off the Visual Editor and instead, display the html that makes up your content. It’s important to note that whilst there is still HTML in your underlying content, the new Block editor also wraps each individual section of your content within HTML comment tags. It uses these comment tags to differentiate the various types of blocks your content is contained within. So, while you can still edit your HTML using the Code Editor view within the Block Editor, please take extra caution not to remove or change any of the HTML comments surrounding your content. Doing so, will cause one or more of your blocks to not display correctly once you switch back to the Visual Editor mode, and may possibly even cause you to lose content.
- Keyboard Shortcuts – Displays a list of the keyboard shortcuts that are available within the Block Editor.
- Copy All Blocks – This option will copy all the content within the current Page or Post, to your clipboard.
- Help – As the Welcome Guide is not very detailed, the Help option provides a link to some external pages that give a more detailed explanation of how to use the Block Editor.
- Manage Patterns – Clicking this option will exit you from the editor and present you with a list of all your Synced Patterns. Synced Patterns, which were previously called Reusable Blocks, will work in exactly the same way as Reusable Blocks. Synced Patterns can be Edited, Deleted or Exported to a JSON file (which can then be imported to another site is so desired). A word of warning, you will not be prompted to save your content, even if it’s changed. You will be taken to your list of Synced Patterns as soon as you click this option which could cause you to lose content if you don’t save your page first.
- Welcome Guide – Displays a very short slideshow explaining what the Block Editor is.
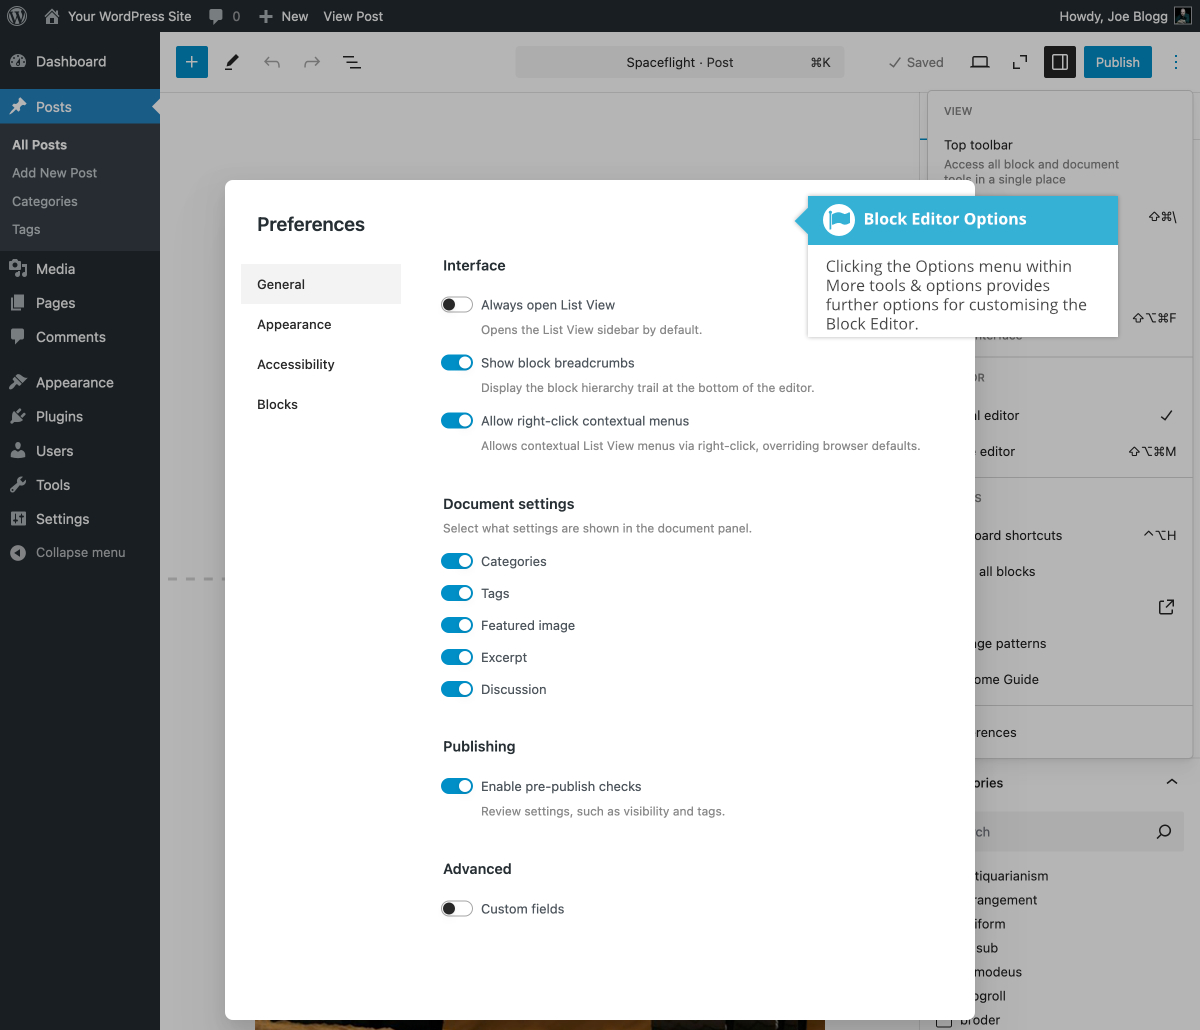
- Preferences – This option provides further options for customising how the Block Editor Displays. You can Turn off/on the Pre-publish Checks, and a number of other Panels, including several default Document Panels such as the Categories, Tags or Featured Image Panels. You can also disable individual blocks or entire block panels, which stops them from being displayed within the Block Inserter. Disabling individual blocks will only disable them for the currently logged in user. They won’t be disabled for any other users on the site.


