Adding Tags within your Post
Short url: https://ewp.guide/go/adding-tags-within-your-post
Adding Tags whilst editing your Post, will automatically assign those Tags to your Post.
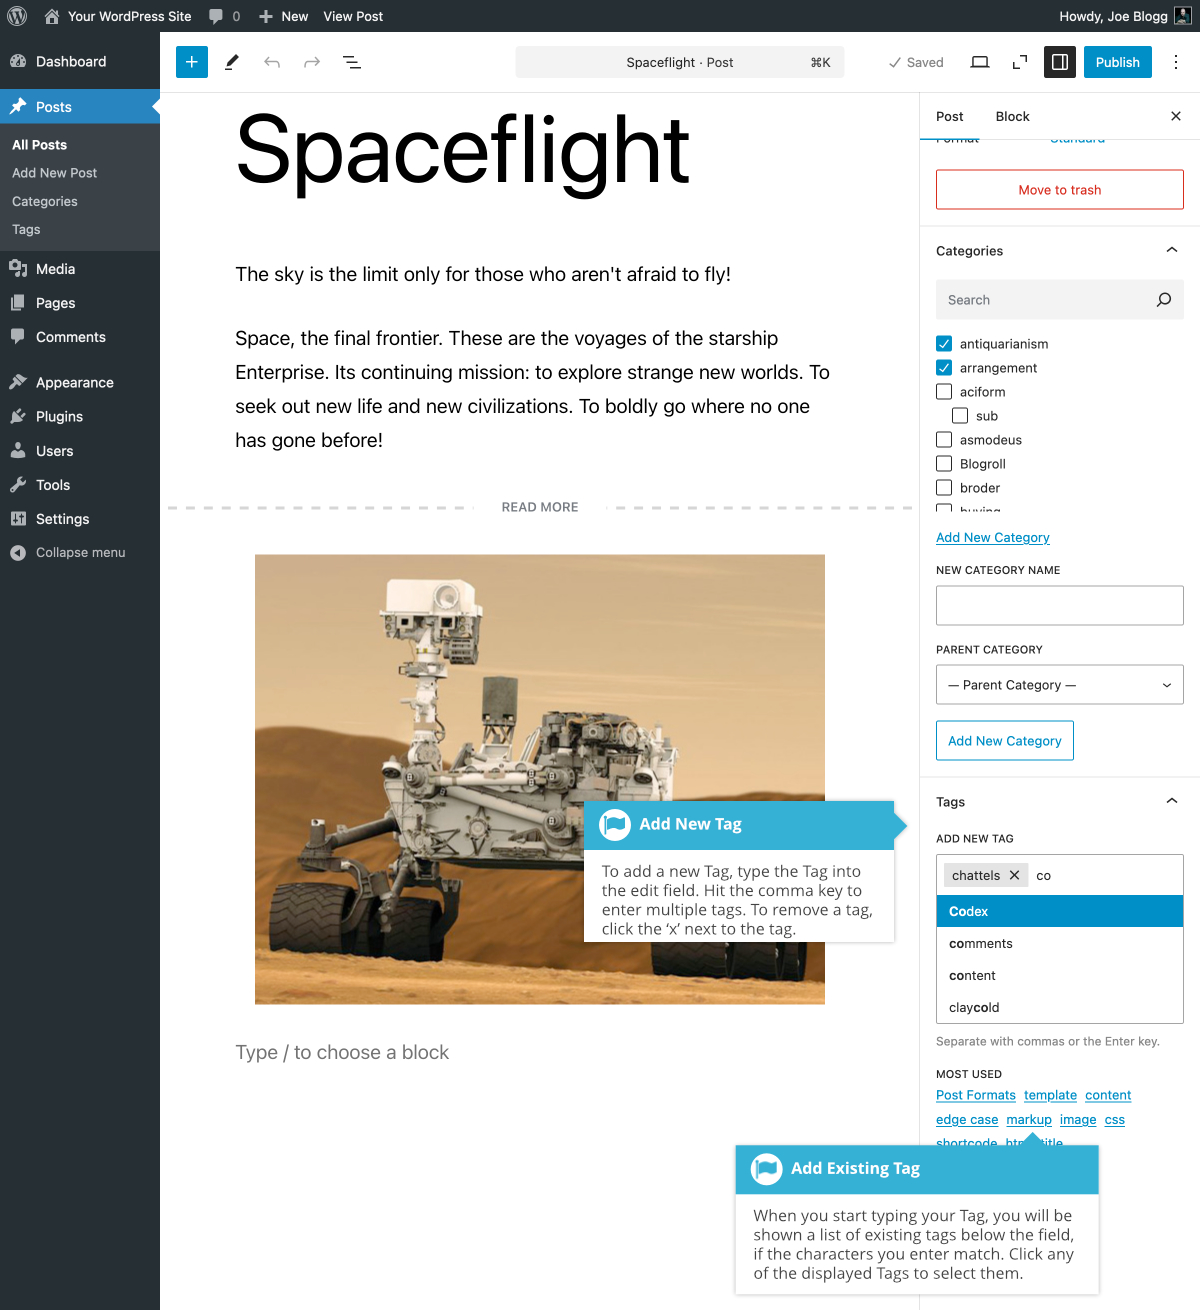
When using the Block Editor, click on the Post tab in the Settings Sidebar. The Tags panel can be found just below the Categories panel. To add a new Tag, simply write the Tag or Tags (separated with commas) into the edit field. If you make a mistake and need to remove a Tag, simply click the small ‘x’ next to the individual tag to remove it.
When you start typing your tags, a list of previously used tags will display below the edit field if any of the characters that you type, match a previously entered Tag. If a list of previous Tags appears, you can click on any of the Tags to select them. You can also click on any of the Tags listed in the MOST USED section, to add them to your Post as well.
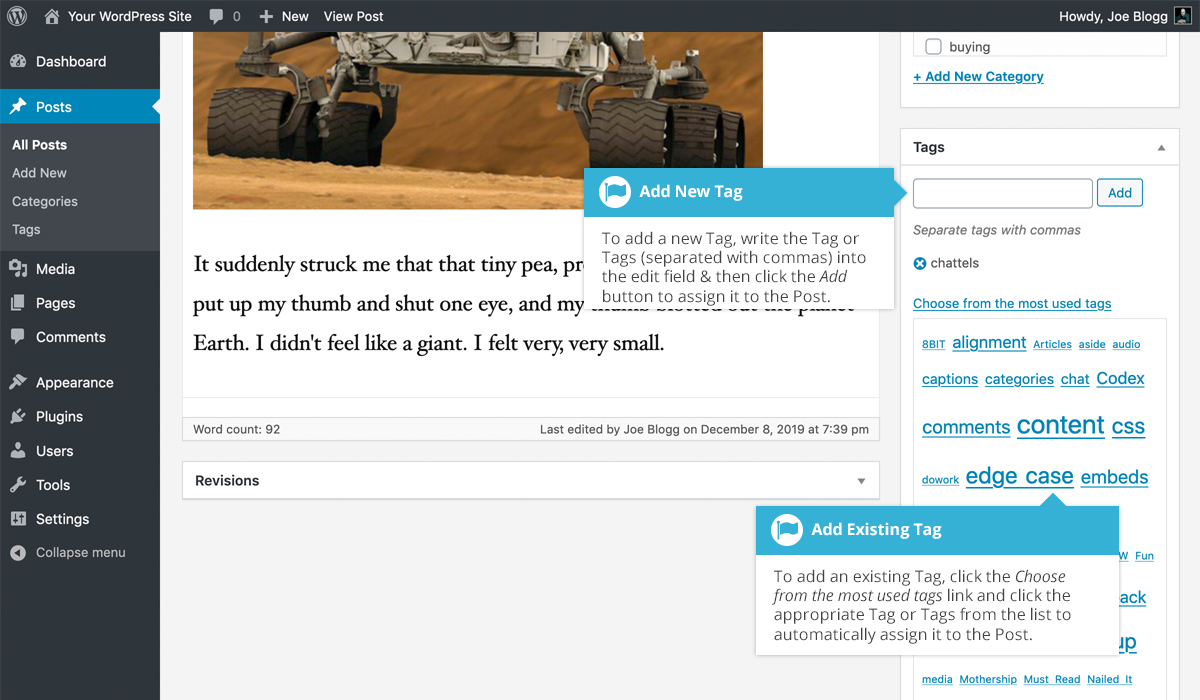
When using the Classic Editor, the Tags panel can be found just below the Categories panel. To add an existing Tag, click the Choose from the most used tags link. This will display a list of previously used Tags (if available). They are arranged alphabetically and in ‘cloud’ format. That is, the more often a Tag has been used, the larger the font it’s displayed in. To add a previously used Tag, simply click on the Tag name and it will be assigned to your Post. To add a new Tag, simply write the Tag or Tags (separated with commas) into the edit field and click the Add button. Tags that are assigned to the Post will be displayed below the edit field. To remove a Tag from your Post, click the small ‘x’ icon next to the Tag name.


