
Inserting Links to Media Files
Short url: https://ewp.guide/go/ce/inserting-links-media-files
Adding a link to media files such as documents or PDF’s is just as easy as adding a standard html link. There are a couple of ways you can go about it.
Click the Add Media button (![]() ) and then simply drag your file from wherever it is on your computer, into the browser window. Your file will be automatically uploaded.
) and then simply drag your file from wherever it is on your computer, into the browser window. Your file will be automatically uploaded.
Alternatively, click the Select Files button and then select the file that you’d like to upload, using the dialog window that is displayed.
Once your file is uploaded, your Media Library, which contains all your previously uploaded files, is displayed. The file that you’ve just uploaded will be automatically ‘selected’ for easy insertion into your Page or Post.
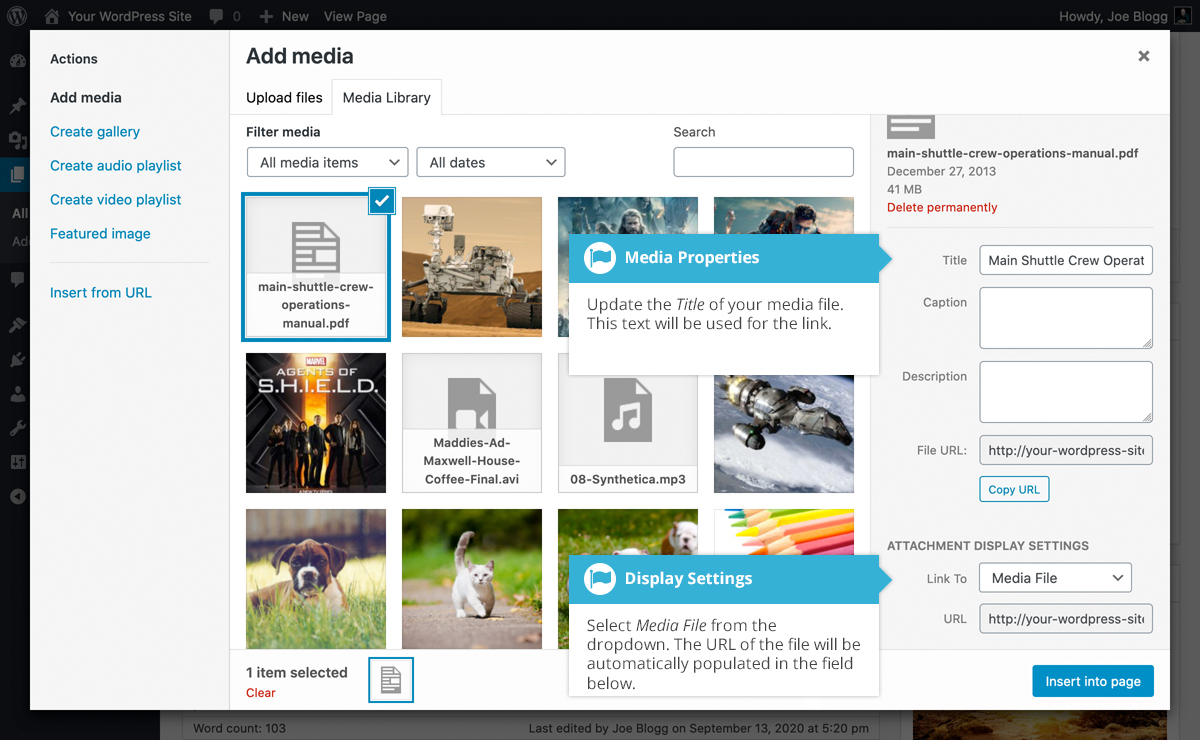
Update the Title for your file. The Title will be used for the text link when it’s inserted into your content. From the Link To dropdown list, select Media File. The field just below this will be automatically populated with the URL for the file.
Click the Insert into post button to insert a link to the selected file in your Post at the current cursor position (when editing a Page, this button will say Insert into page).
If you happen to know the URL for the media file that you’d like to link to or if you’d like to create a link on some existing text, simply click and drag the cursor and highlight the text that you want turned into a link and then click the Insert/edit link button (![]() ). Just like previously, when adding a simple HTML link, enter the URL to your media file and then click the Add Link button. A standard html link will be created that links to the media file that you specified.
). Just like previously, when adding a simple HTML link, enter the URL to your media file and then click the Add Link button. A standard html link will be created that links to the media file that you specified.