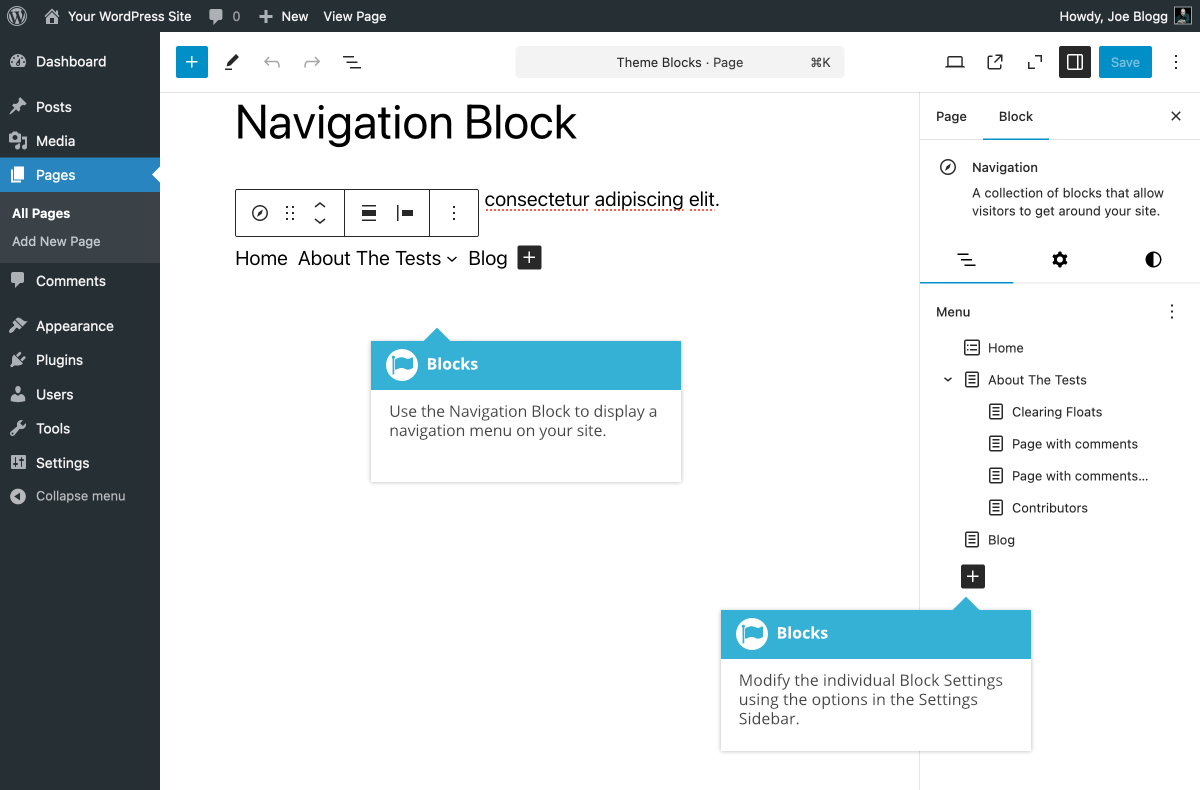
Navigation Block
Short url: https://ewp.guide/go/be/navigation-block
The Navigation Block will display a navigation menu in your content. Although you can add this block into your normal Page or Post content, it will be more useful adding it to your theme’s templates using the Full Site Editor.
The first time you insert the Navigation block, it will appear empty. Using the Choose a Navigation menu icon (![]() ), within the List View tab (
), within the List View tab (![]() ) in the Settings Sidebar, you can select an existing ‘Classic menu’, if you have one available, or you can create a new menu. When you elect to import an existing ‘Classic menu’, it will automatically import all the options for that selected menu.
) in the Settings Sidebar, you can select an existing ‘Classic menu’, if you have one available, or you can create a new menu. When you elect to import an existing ‘Classic menu’, it will automatically import all the options for that selected menu.
It’s important to note that the Navigation Block stores your menu data in a completely different way to how the Classic Appearance > Menus page stores your menu. If you choose to import an existing menu that was created using the Classic Menus page, any changes that you make to that menu will NOT be reflected if you decide to re-edit that menu at a later stage using the Classic Menus screen. The only way to edit a menu created, or imported into the Navigation Block, is by editing the items using the Block itself.
Also, if you’re using a theme specifically built for use with the new Full Site Editor (FSE), such as the Twenty Twenty-Two or Twenty Twenty-Three default themes, you’ll no longer have access to the Appearance > Menus option in the Dashboard. The only way to create a new navigation menu or edit an existing menu, within an FSE Theme, will be by using the Navigation Block.
As well as editing the menu items using the icons within the block itself, you can also edit the menu items within the List View tab (![]() ) in the Settings Sidebar. This latter option, makes it much easier to add and edit menu items, and to add submenus.
) in the Settings Sidebar. This latter option, makes it much easier to add and edit menu items, and to add submenus.
To add a new menu option into your navigation menu, click the Add block icon (![]() ) within the block itself, or within the List View tab (
) within the block itself, or within the List View tab (![]() ) in the Settings Sidebar. If using the Add block icon within the Block, you’ll be shown a small popup window that allows you to search for the Page/Post to insert as the menu item. If you use the Add block icon in the Settings Sidebar, you’ll first need to add a new Page Link Block or Post Link Block before being able to select the Page/Post that you want to use as the menu item.
) in the Settings Sidebar. If using the Add block icon within the Block, you’ll be shown a small popup window that allows you to search for the Page/Post to insert as the menu item. If you use the Add block icon in the Settings Sidebar, you’ll first need to add a new Page Link Block or Post Link Block before being able to select the Page/Post that you want to use as the menu item.
You can use the Open in new tab switch to choose whether you want your menu item to open in a new browser tab or not. If you wish to add a completely custom menu option to you menu, such as a link to an external website for example, simply enter in the custom URL in the small popup window that displays after clicking the Add block icon. Entering in a custom URL and hitting Return/Enter on your keyboard will add this URL as a new menu option. You can then click on the text and edit it, to change the actual text that shows within the menu. As an example, entering https://lego.com in the small popup window will add a new menu item using that link to the LEGO website. The text that is displayed in your menu, for that link, will be lego.com. If you wish to change that link text so that it only displays the word ‘Lego’, you’ll need to click on the text and edit it.
Once you've added the block, and have it populated with menu items, there are further options available in the Settings Sidebar. You can change the Text and Background colours, along with the Submenu and overlay text, and Submenu and overlay background colours. You can also change various Typography settings like Font size, Appearance, Line height, Letter Spacing, Decoration, and Letter case. There are also options for menu justification and orientation. Using the Overlay Menu buttons, you can choose whether or not the menu collapses down to a “hamburger” style icon. Selecting ‘Mobile'will show the hamburger icon only on smaller mobile devices, while selecting ‘Always’ will show the hamburger icon on desktop and mobile devices. If you don’t want the menu to collapse down to a hamburger icon at all, select the ‘Off' option.
The various options for this block are located within separate List View (![]() ), Settings (
), Settings (![]() ) and Styles (
) and Styles (![]() ) tabs, in the Settings Sidebar.
) tabs, in the Settings Sidebar.

