
Edit or Delete an Image
Short url: https://ewp.guide/go/ce/edit-or-delete-an-image
There are various options available for adjusting the layout of inserted images.
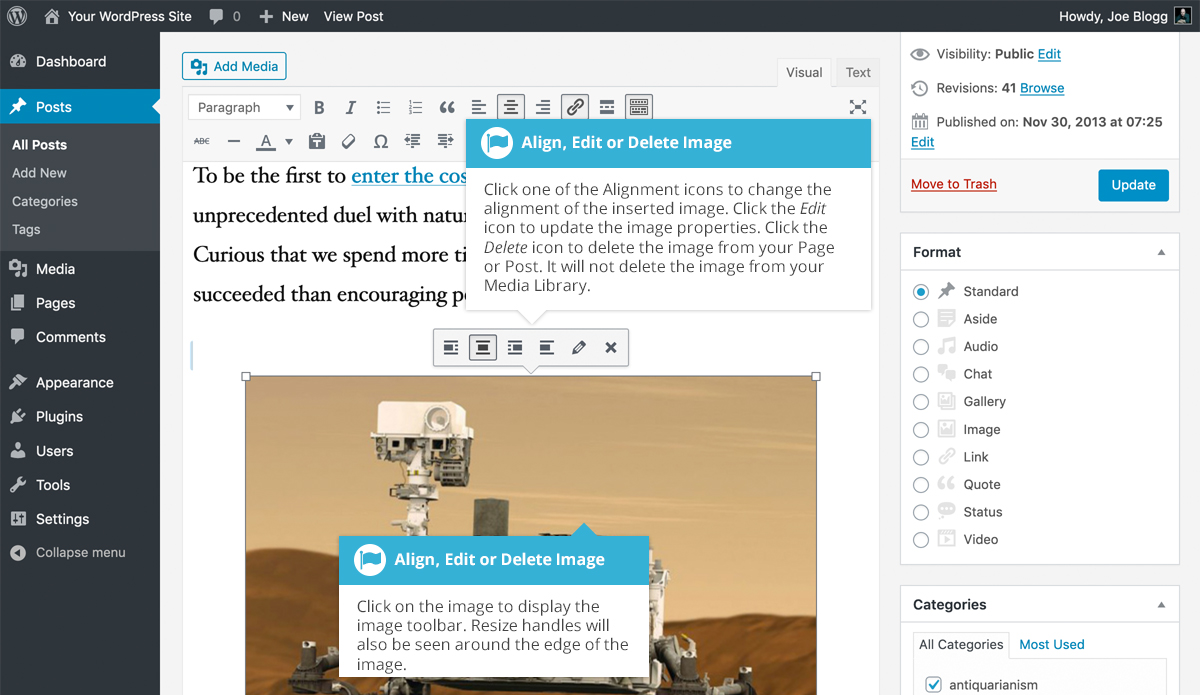
After clicking on an image that has already been inserted into your Page or Post, a small toolbar will appear over the image. By selecting one of the alignment buttons (![]() ) you can change the alignment of the inserted image. Clicking the Edit button (
) you can change the alignment of the inserted image. Clicking the Edit button (![]() ) allows you to edit the image properties. Clicking the Remove button (
) allows you to edit the image properties. Clicking the Remove button (![]() ) will remove the image from your content. It will only remove the image from your Page or Post, it will not delete the image from your Media Library.
) will remove the image from your content. It will only remove the image from your Page or Post, it will not delete the image from your Media Library.
When you click on an image in your Page or Post, as well as the alignment, edit and delete icons mentioned above, the image also displays ‘resizing handles’. These are the small squares you see around the edge of the image. To resize your image, simply click and drag one of the corner resize handles.
As with any image editing software though, if you try to enlarge a small image, it will tend to get quite pixelated. It’s always best to insert a large image and then resize down.
After clicking the Edit button (![]() ) the following pop-up window will appear.
) the following pop-up window will appear.
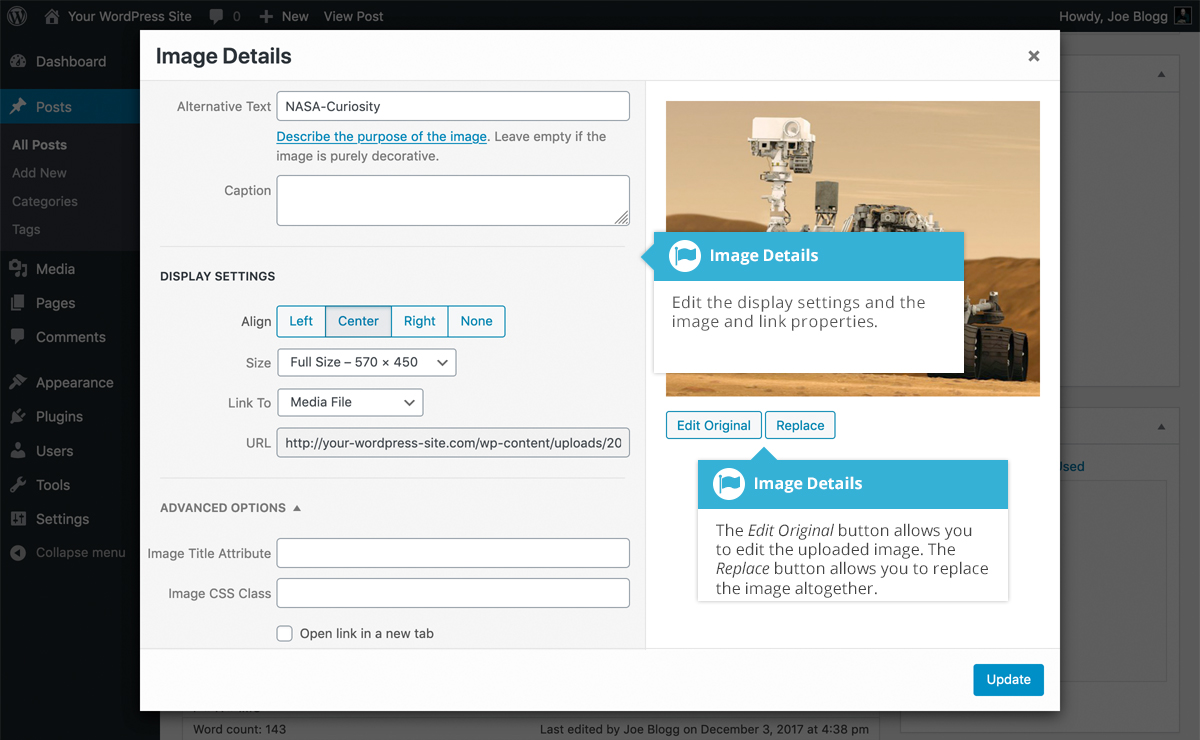
The Image Details pop-up window allows you to edit the various image and link properties:
- Caption – Displayed underneath the image as a short description. How this displays will be dependent on the WordPress theme in use at the time. You can also include basic HTML in your captions
- Alternative Text – Displayed when the browser can’t render the image. It’s also used by screen readers for visually impaired users so it’s important to fill out this field with a description of the image. To a small degree, it also plays a part in your website Search Engine Optimisation (SEO). Since search engines can’t ‘read’ images they rely on the Alt Text
- Align – Allows you to select how you would like the image aligned. They can be either Left, Centered or Right aligned. Setting alignment to None will remove the other alignment settings. How this affects your image within your content will depend on the current theme in use
- Size – Select a specific size from the dropdown list or select ‘Custom Size’ and then enter the Width and Height (in pixels) in the input fields that appear
- Link To – Select where you would like to link your image to from the dropdown list. You have the choice of linking to the image attachment page by selecting Attachment Page, or you can link to the full size image by selecting Media File. You can also link to any URL by selecting Custom URL. When you do this, a new field will appear that allows you to enter in the custom URL. You can also choose not to link to anything by selecting None
- Image Title Attribute – Displayed as a tooltip when the mouse cursor hovers over the image in the browser
- Image CSS Class – By default, WordPress will assign several CSS Classes to your image. If, for some reason, there’s other CSS Classes that you’d like to assign to your image then you can add them into this input field
- Link Rel – describes the relationship from the current document to the specified link. More information on the rel HTML attribute can be found on Wikipedia
- Link CSS Class – If there is a specific CSS Class that needs to be set on the HTML link then you can add it into this input field
Clicking the Edit Original button allows you to perform some simple manipulation with your uploaded image. You’re able to rotate and flip your image as well as scale and crop it to different sizes.
If you’d like to replace the image entirely, click the Replace button and you’ll be shown your Media Library where you can select a new image.
Once you have updated the image properties, click the Update button to save your changes. Alternatively, click the small ‘x’ in the top-right of the pop-up window to close the pop-up without saving any changes.